Showing posts with label sunflowers. Show all posts

October 29, 2010

Happy Halloween!

With all of the decorations and costumes in all of the stores this season, I couldn't stop my creative side from catching the Halloween bug! I was inspired last week to bake a few goodies for my co-workers and the ladies at my mom's office. This post is a little different from the others. I've decided to do more of a tutorial than just pretty pictures. :) The recipes I used for the cookies and icing are from this post. I hope you get inspired to try them yourself and see how easy decorating cookies can be!

FALL COOKIES: (for the office ladies)


Pumpkin


1. Pipe the stem with Wilton icing tip #3. Let dry. (about 5-10 min.)
2. Fill in the pumpkin with tip #3. You can outline the edge of the pumpkin to create a border and then fill in the middle. Let dry. (about 5-10 min.)
3. Pipe the lines on with tip #3. Let dry. (about 5-10 min.)
4. Pip on the vines with tip #1. Let dry. (about 5-10 min.)


Mum


1. Pipe the inner circle with tip #3.
2. Pipe the outer circle in a zig zag to create the edges of the petals with tip #3.
3. Before the icing has time to set and dry drag a toothpick from the inner circle to the outer circle to creat the two toned flower design. Let dry. (about 5-10 min.)
4. Fill in the middle with yellow with Wilson icing tip #3. Use the icing tip
to make the points in the middle. To do this you just put the tip straight down in the icing and lift straight up. It will make small points that should dry to look like the center of a flower.


Sunflower


I completely forgot to take "Step shots" of this one.
1. Pipe the petals with tip #3. Be sure and do every other one and let them set/dry before you fill in the rest of the petals. If you do them all at once the royal icing will run together and you'll have one giant sloppy flower.
2. Pipe the middle with tip #3, but like the petals, do every other one or else you won't have the defined sunflower seed look.


Corn on the Cob


1. Pipe the green icing in the shape of corn husks using Wilson icing tip #3. Let dry. (about 5-10 min.)
2. Pipe the rows for the corn using tip #1. Let dry. (about 5-10 min.)
3. Pipe the corn husk details using tip #3. Let dry. (about 5-10 min.)
4. Pipe beads of icing in brown and tan to look like corn pieces. Let dry. (about 5-10 min.)
5. Continue to fill in the corn rows with yellow. Be sure not to place two beads next to each other in between piping or else they will run together and create a pool instead of the individual corn pieces. Let dry. (about 5-10 min.)


HALLOWEEN COOKIES: (for the co-workers)


Black Cat


1. Pipe the border of the cat with Wilson icing tip #1. Let dry. (about 5-10 min.)
2. Fill in the center. Let dry. (about 5-10 min.)
3. Pipe the green eyes with tip #3 and immediately pipe in the pupils with tip #1. Let dry. (about 5-10 min.)


Jack'O'Lantern


1. Pipe the stem on with Wilson icing tip #3. Let dry. (about 5-10 min.)
2. Pipe the face of the Jack'O'Lantern with tip #1. Let dry. (about 5-10 min.)
3. Pipe the border of the pumpkin with icing tip #3. Let dry. (about 5-10 min.)
4. Fill in the middle of the pumpkin. Be careful not to push icing on top of your Jack'O'Lantern face. Let dry. (about 5-10 min.)
5. Pipe the lines of the pumpkin with tip #3. Let dry. (about 5-10 min.)


Ghost


I completely forgot to take "Step shots" of this one too.
1. Pipe the border with Wilson icing tip #3. Let dry. (about 5-10 min.)
2. Fill in the center of the ghost. Let dry. (about 5-10 min.)
3. Pipe the details of the face with icing tip #1. Let dry. (about 5-10 min.)


Bats


1. Pipe the border with Wilson icing tip #1. Let dry. (about 5-10 min.)
2. Fill in the center. Let dry. (about 5-10 min.)
3. Pipe the eyes with tip #3 and then immediately pipe the pupil with tip #1. Let dry. (about 5-10 min.)
4. Pipe the mouth and fangs with tip #1. Let dry. (about 5-10 min.)
5. Pipe the hairy body with tip #1. Let dry. (about 5-10 min.)
6. Pipe the details of the wings with tip #1. Let dry. (about 5-10 min.)

May 14, 2010

Hello sunshine!

We all know the old saying, "April showers bring May flowers!". We've had a lot of rain this spring, so needless to say, I'm ready for some flowers! So, I made my own.

This past week I made cupcakes for a BBQ picnic we threw for one of my coworkers. This was her last week because she and her family about to have a new little bundle join their lives.

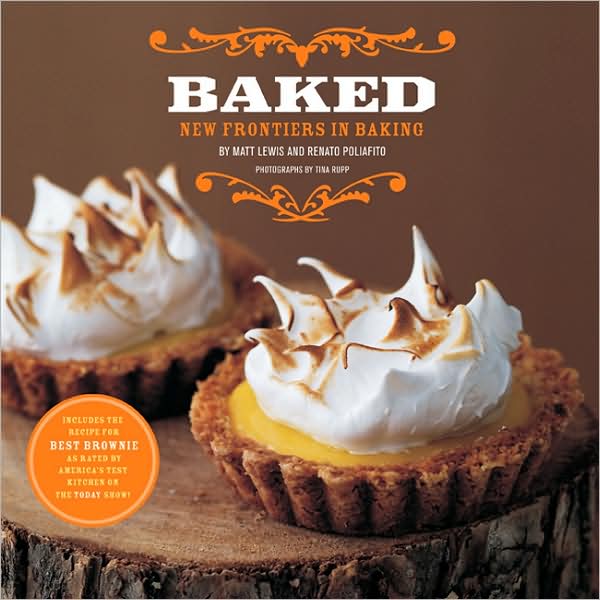
I've been working my way through a new cook book I picked up at C&B, Baked: New Frontiers in Baking. The authors Matt Lewis and Renato Poliafito are also the owners of Baked in Brooklyn, NY. My favorite thing about the book and their recipes is that it seems like they just tweaked American classics by using higher quality ingredients and updated flavorings. Everything just seems to have a different and special touch.


I decided to make their Devil's food cake cupcakes...what pregnant woman doesn't like chocolate, right? This was my first time making these and they were AMAZING! Light, fluffy, moist...everything you want in a cupcake!

DEVIL’S FOOD CAKE

For the cake batter:
1/3 cup Dutch-processed cocoa powder, sifted
1 teaspoon instant espresso powder
4 ounces semisweet or bittersweet chocolate, finely chopped
1 cup boiling water
2 teaspoons pure vanilla extract
1 cup buttermilk
½ cup (1 stick) unsalted butter, at room temperature
½ cup vegetable oil
1 cup firmly packed dark brown sugar
1 cup granulated sugar
3 large eggs, at room temperature
2 ¼ cups cake flour
1 teaspoon baking soda
½ teaspoon salt


1. POSITION A RACK IN THE MIDDLE OF THE OVEN AND PREHEAT TO 350 DEGREES FAHRENHEIT. Lightly grease two 9-inch round cake pans or spray with nonstick cooking spray. Line the bottoms of the pans with circles of parchment or waxed paper. Grease the paper or spray lightly with cooking spray.
2. IN A LARGE BOWL, combine the cocoa powder, espresso powder, and chocolate. Pour in the boiling water and stir until the chocolate is melted and the mixture is smooth. Stir in the vanilla. Let the mixture cool, then stir in the buttermilk.
3. IN ANOTHER BOWL, using an electric mixer set at medium speed, beat the butter and oil together until light and fluffy. Add the sugars and beat until creamy. Beat in the eggs, one at a time, beating well after each addition.
4. SIFT TOGETHER THE FLOUR, baking soda, and salt onto a sheet of waxed paper. Add one-third of the flour mixture to the batter and beat at low speed for a few seconds, just until combined. Beat in half of the chocolate-buttermilk mixture, again beating just for a few seconds until combined. Scrape down the sides of the bowl with a rubber spatula. Beat in another one-third of the remaining flour mixture for no more than a few seconds, just until combined. Add the remaining chocolate-buttermilk mixture, beating just for a few seconds until combined. Finally, fold in the remaining one-third of the flour mixture by hand, using a large balloon whisk or rubber spatula, just until no streaks of flour remain.
5. DIVIDE THE BATTER BETWEEN THE PREPARED CAKE PANS AND SPREAD EVENLY. Bake until a wooden skewer inserted in the center of a cake comes out clean, 25 to 30 minutes. Transfer to wire racks and let cool for 5 to 10 minutes. Invert the cakes onto the racks and peel the parchment paper from the layers. Cupcakes take about 15 to 16 minutes to bake. Let cool completely before frosting.

To go along with the picnic theme I decorated them to look like sunflowers. I used a basic buttercream icing recipe, mini chocolate chips for the centers and royal icing to make the lady bugs.